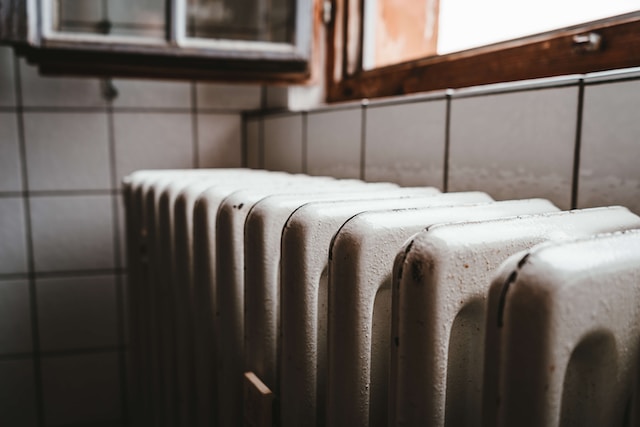
Heaters are not as reliable as they used to be. Many homeowners become frustrated when their heating systems fail to turn on during the cold season.
Some signs that it is time to call for a repair include: rising energy bills, rattling or squeaking noises from the unit, and deteriorating operational efficiencies.
1. Check the Thermostat
The thermostat in your heating system senses the temperature of your home and tells the furnace (or air conditioner) to provide heated or cooled air. If it isn’t working properly, you might think that the HVAC unit itself is broken and need to call in a professional to fix it. However, there are a few things you can try to get it up and running again before you spend any money on an expensive repair bill.
First, make sure the thermostat’s screen is actually lit up. If it isn’t, the problem could simply be a simple one like low batteries or a blown fuse. Try replacing the batteries or looking for a blown fuse in your electrical panel. Thermostats can also malfunction if they aren’t cleaned regularly. This can be a problem with both mechanical and electrical components, and it can cause the thermostat to not function properly. Use a can of compressed air or a small brush to clean the inside of the thermostat housing.
Another potential problem is that the thermostat may not be correctly positioned in your home. This can affect both programmable and non-programmable thermostats. If it is located directly above or beneath a register, for example, it might prematurely shut off the system because it won’t sense that your home has reached the desired temperature. Try moving it to a more central location to resolve this issue.
Finally, there are a few more advanced troubleshooting steps you can try. These will depend on the kind of thermostat you have, but in general, a multimeter can be used to bridge two terminals and check for an expected reading. If the meter reads zero, the thermostat is probably faulty and needs to be replaced.
2. Check the Filter
If you notice that your furnace isn’t heating your home as it should, the first thing you should check is the air filter. A dirty filter will cause the furnace to work harder, which can lead to a lower-temperature home. If you haven’t changed the filter recently, you should do so.
A gap or tear in the air duct can cause the system to bypass the filter completely, which will negatively impact your system’s performance and the health of your family or housemates with allergies or respiratory conditions. This problem is relatively easy to fix by examining the gap, finding where the air is escaping and applying metallic foil tape or duct mastic to repair it.
This is another issue that you can easily correct yourself, which will save you money on energy costs and repairs. It’s also important to keep in mind that running the system temporarily without a filter is fine, but you shouldn’t make this a habit. Changing the filter is a quick, simple task that’s one of the best maintenance tips for beginners.
3. Check the Condensate Drain
The condensate drain line carries excess moisture created by the air conditioner’s evaporator coils, which absorb heat from the indoor air and condense. It sends the condensation to an overflow drain pan and then into a PVC condensate drain pipe that directs it outdoors. If the drain line becomes clogged, a number of problems can occur.
A clogged drain line can be the result of dirt, dust, mold, mildew, and other debris that works its way into the drain line. In addition, if the drain line is not properly flushed, algae and bacteria can build up inside.
When a clog is present, the most obvious symptom is puddles of water around the AC unit. The drain line is a pathway for condensation to leave the overflow pan and enter your home, so it is important that it stays clear of obstructions.
The best way to check the condition of your condensate drain is to turn off your furnace (the power switch or breaker must be turned off) and then remove the cap on the access point, usually a PVC pipe tee attached to the overflow drain pan. If you notice that the cap is missing, it has probably been pushed down and discarded. Afterward, you can use vinegar, bleach, peroxide, or hot soapy water to flush the drain line and prevent further clogs. Make sure to flush the drain line each month to avoid bacterial buildup and other issues. A musty smell when the system is running is also a sign of mold and mildew in the condensate drain line, which can lead to health problems for your family. A chemical treatment tablet, such as these ones from Clean Flow, dropped in the overflow drain pan each month can inhibit slime growth and help keep the drain line clog-free.
4. Check the Electrical Connections
If your circuit breakers are tripping often, this may be a sign that there is a problem with the electrical wiring. This can be caused by corrosion, a bad connection or even an exposed wire. If the problem is in the wiring, it can lead to fires and should be addressed immediately by a professional.
To check the wiring, first turn off the power to your water heater. Then, remove the metal panel on the water heater, wearing rubber gloves for protection. Locate the wires that connect to the heating system, and then turn on your multimeter to the lowest ohms setting. Place one meter probe on the terminal marked R and the other on the terminal marked G. If you have continuity, the heating system is working correctly. If there is no continuity, then the wiring is faulty and should be replaced.
You should also check the wiring in the cable power connection box and at the end of the heat trace run. This will help you isolate any problems that may be affecting the heat output. It is also a good idea to run a megger test on each individual heating cable section, comparing the insulation resistance between the metal braid and the conductive core.
Finally, if you notice any signs of charring around the edges of any wire connections in the cable power connection box, this could be a sign that the wires are deteriorating or have become damaged. It is important to use only approved connectors, such as wire nuts, on any pass-through wire connections in the box. Avoid using electrical tape for any connections, as it will melt and degrade over time.
5. Check the Air Filter
A dirty filter causes the furnace to work harder to maintain a set temperature, and it also reduces indoor air quality. It can lead to carbon monoxide leaks as well, which are dangerous to you and your family.
You can find your filter by checking the return air duct that runs down next to the furnace or indoor unit. This is often located in a basement, crawl-space, garage or utility closet. Sometimes, the filter is inside the furnace itself or behind a central filter grille that hangs in a wall or ceiling.
If you cannot locate the filter, check your system’s owner manual for help. Most systems will have a small access door in the return air duct that leads to the filter rack. You can usually open the filter rack door by turning a knob or screw. Then you can remove the filter and replace it with a new one.
Before you do this, check the dimensions of the filter and purchase a replacement that is the same size. Purchasing a filter that is too big or too small can cause gaps to form, which allow dust and debris into your system.
Once the filter is replaced, close the filter rack door and restart your heating system. If you still have problems, try blowing air into the ducts and feeling for drafts to determine where the holes or leaks are. You can repair these by using metallic foil tape or duct mastic. Alternatively, you can hire a professional to do the work for you. Just remember to schedule regular maintenance visits to keep your heating system in the best condition possible. A routine tune-up will help the system last longer and save you money by reducing energy consumption.